Updated 17 September 2026
How to convert MBOX to PST
For a complete mailbox, select the copied MBOX files, choose a new PST destination, and run the converter on a Windows computer with classic Outlook installed.
MBOX stores many email messages in one or more mailbox files. Classic Outlook cannot open MBOX directly, so the converter creates a PST, the Outlook data file that keeps mail and folders together. This workflow uses classic Outlook, the Windows desktop app with a File tab; new Outlook cannot run the converter.
The direct converter workflow below is the main route for a complete mailbox. A manual EML route follows for readers who only need a few messages.
Convert with the MBOX to PST utility
The MBOX to PST converter reads the mailbox files directly, creates the PST, and can reproduce the source folder tree when you include subfolders. It carries message bodies, attachments and formatting into the Outlook data file. Turn on Add Internet headers if you also need the full delivery headers.
Step 1. Launch the utility
Install the MBOX to PST converter. Our installer includes Convert MBOX to PST as part of ReliefJet Essentials. Open it from the standalone ReliefJet Essentials launcher or from the ReliefJet tab that the installer adds to classic Outlook, then select Convert MBOX to PST. The standalone launcher can run while the Outlook window is closed, but supported classic Outlook must still be installed.
Step 2. Choose the source
Select one MBOX file or the folder that contains your MBOX files.
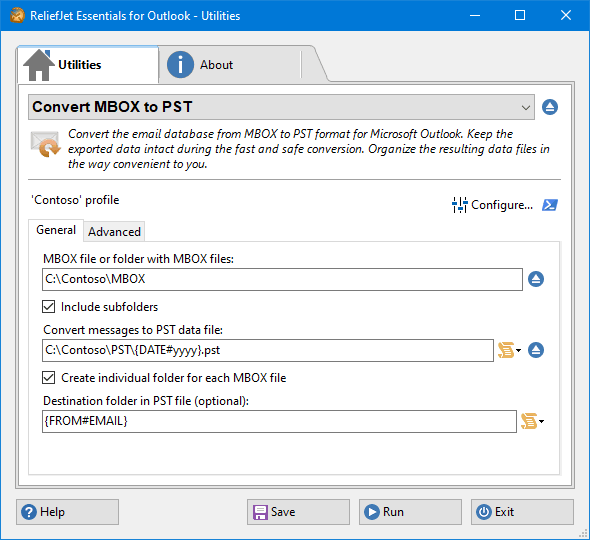
Turn on Include subfolders when the source contains nested mailbox folders. This lets the converter process the whole tree in one run.
Step 3. Choose the destination file
Choose a path and filename for a new PST on a local drive outside OneDrive or other synced folders. You can also select an existing PST to add mail to it, but a new file makes the first result easier to identify and check.
Step 4. Run the conversion and open the PST
Click Run and wait for the report. Review any skipped files or rejected messages. Then choose File → Open & Export → Open Outlook Data File in classic Outlook, select the new PST, and confirm its main folders. Open an old message, a recent message, and several attachments before removing or changing the MBOX source.
Close Outlook and the converter before copying the finished PST to network or cloud storage for backup.
For a large or important mailbox, use the PST verification checklist for message counts, dates, headers, Gmail labels, and exceptions.
Optional: choose names and folders
These settings are on the General tab. Use them if you want to organize the converted mail before starting the run.
Create separate PSTs by date or mailbox
Splitting can make a large conversion easier to store and open. A filename macro is a placeholder that the converter replaces with a value such as the message year or source filename. If your license includes macros, insert one before the .pst extension to create separate PST files by that value.
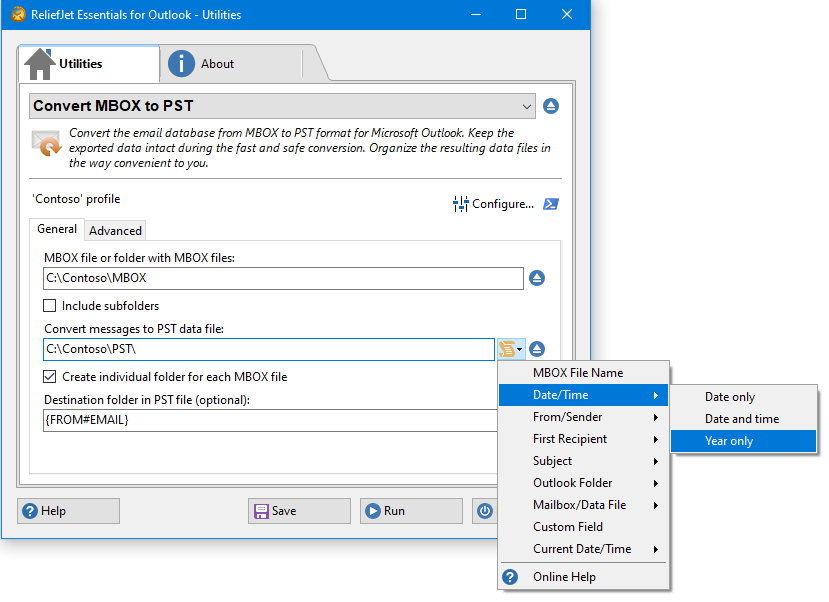
Put converted mail in a named folder
Use Destination folder in PST file when you want converted mail inside a named folder rather than at the PST root. If your license includes macros, this field can also create destination folders from values such as the source filename or message year.
What the Advanced tab is for
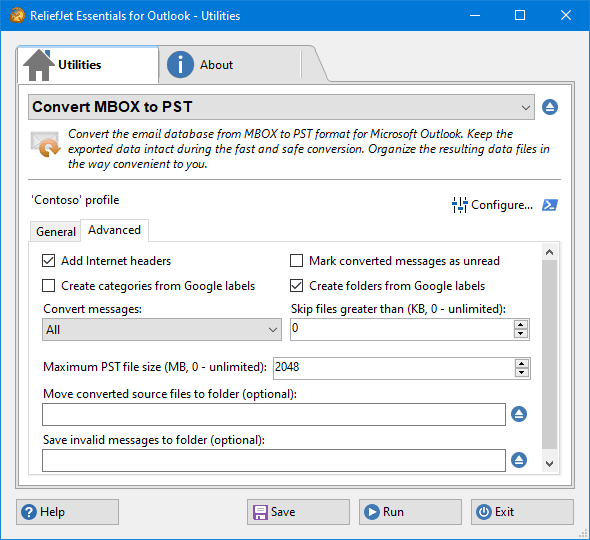
Most conversions can use the basic source and destination fields. Open the Advanced tab when you need to preserve full delivery headers, represent Gmail labels, convert only selected source files, or split a large PST.
Keep the full message headers
Full Internet headers show the servers and routing information used to deliver a message. Turn on Add Internet headers when you need those details for troubleshooting or records; they add technical information that Outlook does not normally show in the message body.
Turn Gmail labels into folders — or into categories
A Google Takeout MBOX stores Gmail labels with each message, but Outlook has no identical label system. Choose Create folders from Google labels to browse those labels as PST folders, or Create categories from Google labels to attach them to messages as Outlook categories. Check a message that had several labels to see whether the chosen layout suits you.
Find the converted messages afterward
Mark converted messages as unread changes their read state, which can make a new batch easier to see. If the destination already contains unread mail, use a separate destination folder or a new PST to distinguish the converted messages reliably.
Convert only part of the source
The message filter can include all messages, only messages with attachments, or only messages without attachments. Skip files greater than is different: it excludes an entire source MBOX file above the chosen size in KB. Set it to 0 if no MBOX file should be excluded.
Split the result by size
Maximum PST file size starts another destination PST when the current file reaches the chosen size. The value uses MB, and 0 means no converter-imposed limit. Microsoft documents a default 50 GB limit for Unicode PST files in Outlook 2010 and later, but very large files can perform poorly. Choose smaller parts when practical; see Microsoft's PST size guidance.
Avoid reprocessing completed source files
For a multi-file source, you can tell the converter to move successfully processed MBOX files to another folder. A later run will then ignore those moved files. This does not detect duplicate messages inside a new export, so use a new destination PST when you need to rerun uncertain input.
See what a damaged mailbox could not convert
Choose a folder for messages the converter cannot read. Rejected items will be available there for inspection instead of appearing only as entries in the run report.
Transfer a few messages using EML
EML is a file format for one email message. You can save selected messages as EML, drag them into classic Outlook, and then export that Outlook folder to PST. Because EML does not carry the whole folder tree and Outlook support varies by version, use this route for a small selection after trying a few messages.
Step 1. Save the messages as EML files
In Thunderbird, select the messages and choose Save As… to create one EML file per message.
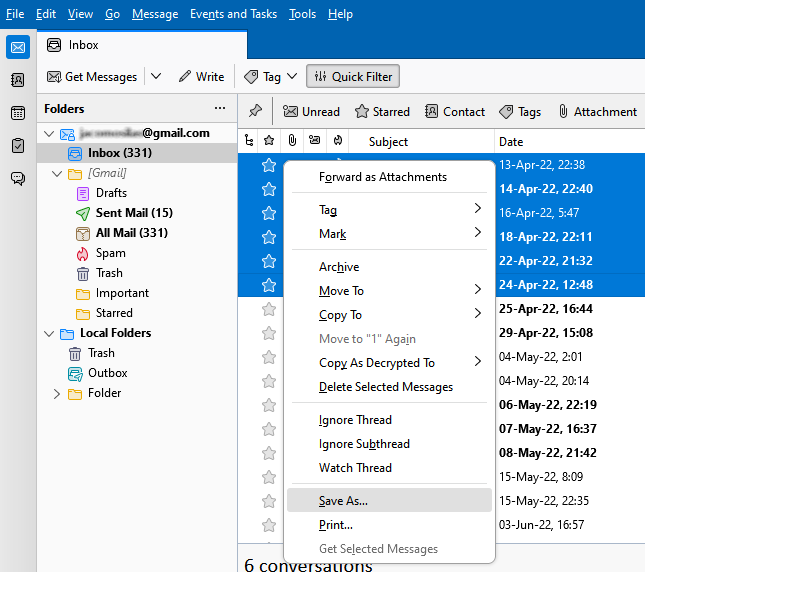
Other mail apps may use a different export command. Make sure the result is an ordinary .eml file that opens as an email message before exporting the rest.
Step 2. Drop the EML files into Outlook
Create a folder in classic Outlook and drag in a few EML files. Open the imported messages and their attachments. If your Outlook version accepts them as normal mail items, continue in manageable batches. Otherwise, use direct MBOX conversion or a server-based transfer.
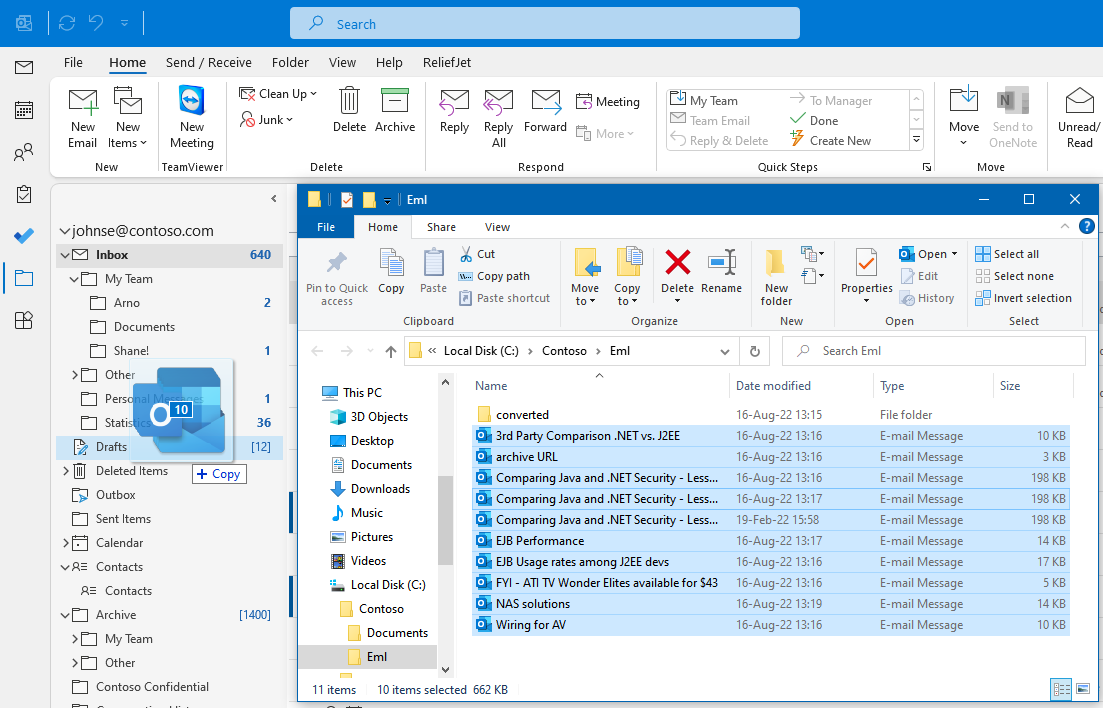
Step 3. Export the Outlook folder to a PST file
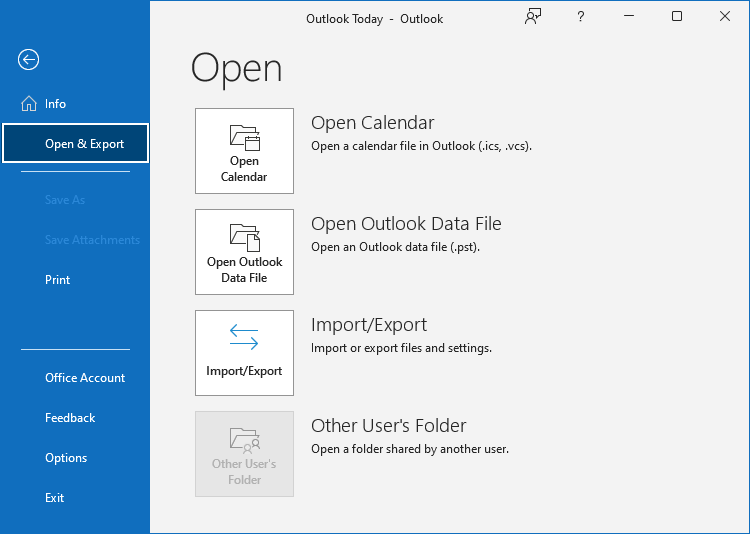
Choose File → Open & Export → Import/Export.
Select Export to a file, then Outlook Data File (.pst), and select the Outlook folder that contains the imported messages.
Step 4. Name the PST file and finish
Choose the location and filename for the PST, then click Finish.
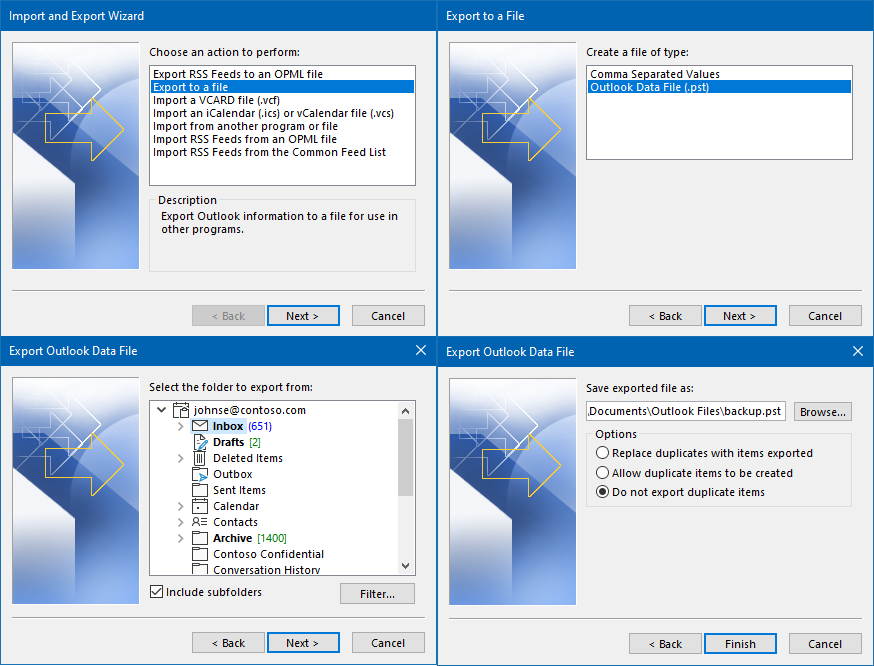
Repeat the process for every source folder you need. EML files do not recreate the original folder tree automatically, which is why direct MBOX conversion is usually easier for a complete mailbox.
Automate conversion with scripts or Task Scheduler
The converter can process all MBOX files in a selected folder through its normal window. If you need unattended conversion from scripts or Windows Task Scheduler, Professional is the paid license tier that adds the ExecutorCli.exe command-line tool. It is relevant to repeatable automation, not to a normal one-time conversion in the app.
- Configure and run one representative conversion in the ReliefJet Essentials launcher.
- Choose Show command line to generate the exact executable, utility code, and case-sensitive parameters for those settings.
- Run that command with a copied source under the Windows account that will own the scheduled task. Classic Outlook must be installed and configured for that account.
- Save the output log and check the exit status:
0means success,1cancellation, and2error. - Add the tested command to Windows Task Scheduler after its PST passes the same content checks as an interactive run.
See the command-line reference and the license comparison before setting up automation.
Which route to choose
IMAP keeps mail apps synchronized with a server. You can connect mail already on that server, or open a local MBOX in a compatible app and copy its messages into an IMAP account you are authorized to use.
Swipe or scroll to compare all columns.
| Source and goal | Best route | Main constraint |
|---|---|---|
| A few selected messages | EML files, then Outlook export | Folder tree must be recreated manually |
| A complete MBOX archive | Convert MBOX to PST | Requires Windows and classic Outlook |
| Mail already on a server, or local mail you can upload | IMAP synchronization through an authorized account | Local mail needs a compatible reader first; server quotas and upload/download time apply |
| Repeated unattended conversions | Generated command line | Requires an automation license and a configured Windows account |
For source-specific preparation, see the Thunderbird, Google Takeout, or Apple Mail guide.
Primary sources
Open your MBOX email in Outlook
Download the Windows converter and try it with a copy of your mailbox. You will need classic Outlook installed on the same computer.